ic Test Blog: Fast And Easy Recipe
Showing posts with label Fast And Easy Recipe. Show all posts

Sunday, November 2, 2014

Easy Weeknight Meal With Daisy Cottage Cheese

My thanks to Daisy Brand for sponsoring today’s post. My love for Daisy Cottage Cheese is always my own opinion! 
Daisy Cottage Cheese Spaghetti Pie Recipe
I am always on the look out for healthy snacks and meals.  One of my MUST HAVES in the fridge is a big ole carton of Daisy Cottage Cheese. 
Daisy Cottage Cheese Spaghetti Pie Recipe
Nothing satisfies my snack cravings while watching TV at night like a small bowl of cottage cheese with a cut up banana in it. I also pack some everyday in with my lunch to have with my salad at work. I love that Daisy Cottage Cheese is jammed full of protein. The 2% cottage cheese (my all time fave FYI!) has 13 grams of protein and only 90 calories per 1/2-cup serving. It’s a great way to enjoy low-fat,  100% natural cottage cheese without giving up the oh so creamy, delicious taste. I also love that Daisy Cottage Cheese is 100% pure! This means there are no additives, preservatives, or added growth hormones in their cottage cheese. It's just naturally good.
Daisy Cottage Cheese Spaghetti Pie Recipe
I've also been incorporating Daisy Cottage Cheese in some of my recipes. This quick and healthy Weeknight Spaghetti Pie is the perfect meal to get on the table fast any night of the week!
Daisy Cottage Cheese Spaghetti Pie Recipe
Weeknight Spaghetti Pie
6 ounces spaghetti
2 Tablespoons butter
1/3 Cup grated Parmesan cheese
2 well beaten eggs
1 pound ground beef
1 Jar Spaghetti Sauce
1 cup Low Fat Daisy Cottage Cheese 
4 Slices Provolone Cheese

Preheat oven to 350 degrees.
Cook the spaghetti in salted boiling water, drain.
Stir butter into hot spaghetti. Stir in Parmesan and beaten eggs. Form spaghetti mixture into a "crust" in a buttered 10 inch round baking dish.
Brown ground beef in a large skillet.  Drain. Stir in spaghetti sauce. 
Spread cottage cheese over the spaghetti crust in the baking dish. Pour and spread the hamburger mixture over the cottage cheese. Top with the provolone cheese slices. Bake uncovered in a 350 degree oven for 20 minutes or until bubbly and cheese has started to brown. 

Daisy Cottage Cheese Spaghetti Pie Recipe
Slice and serve with a salad for a healthy fast meal.
Daisy Cottage Cheese Spaghetti Pie Recipe
Just look at those sweet little pearls of cottage cheese!  Oh. Yum. 

Now, tell me how you like your cottage cheese. Breakfast, lunch, dinner or as a healthy snack?

If you need more inspiration, head over and visit Daisy Cottage Cheese for some pretty awesome recipes (Coffee Caramel Cheesecake Cups anyone?)!

Like what you see? 


Well then, follow me by email and never miss a new post
Click here to see where I may be partying this week. 
AND
Don't forget to come by on Tuesday's
for the link party.

Wednesday, August 21, 2013

Please Welcome My Guest - Allison

My sweet friend Allison from Polka Dots and Paisley has offered to help with a guest post while we are moving this month.  
Please give Allison a warm Kathe With An E welcome!

Hi everyone. I'm Al from Polka Dots and Paisley, where I post a little bit of everything: crafts, artwork, recipes, organizational ideas and more. I'm thrilled to be posting here at Kathe With An E while Kathe is in the process of moving. I can't wait to see all the before and after's from her new house!
I recently spent some time visiting a friend and her family in southern Saskatchewan. I love spending time with her, her husband, and their incredible little girls. They live on a beautiful acreage that is calm, peaceful, and good for the soul.
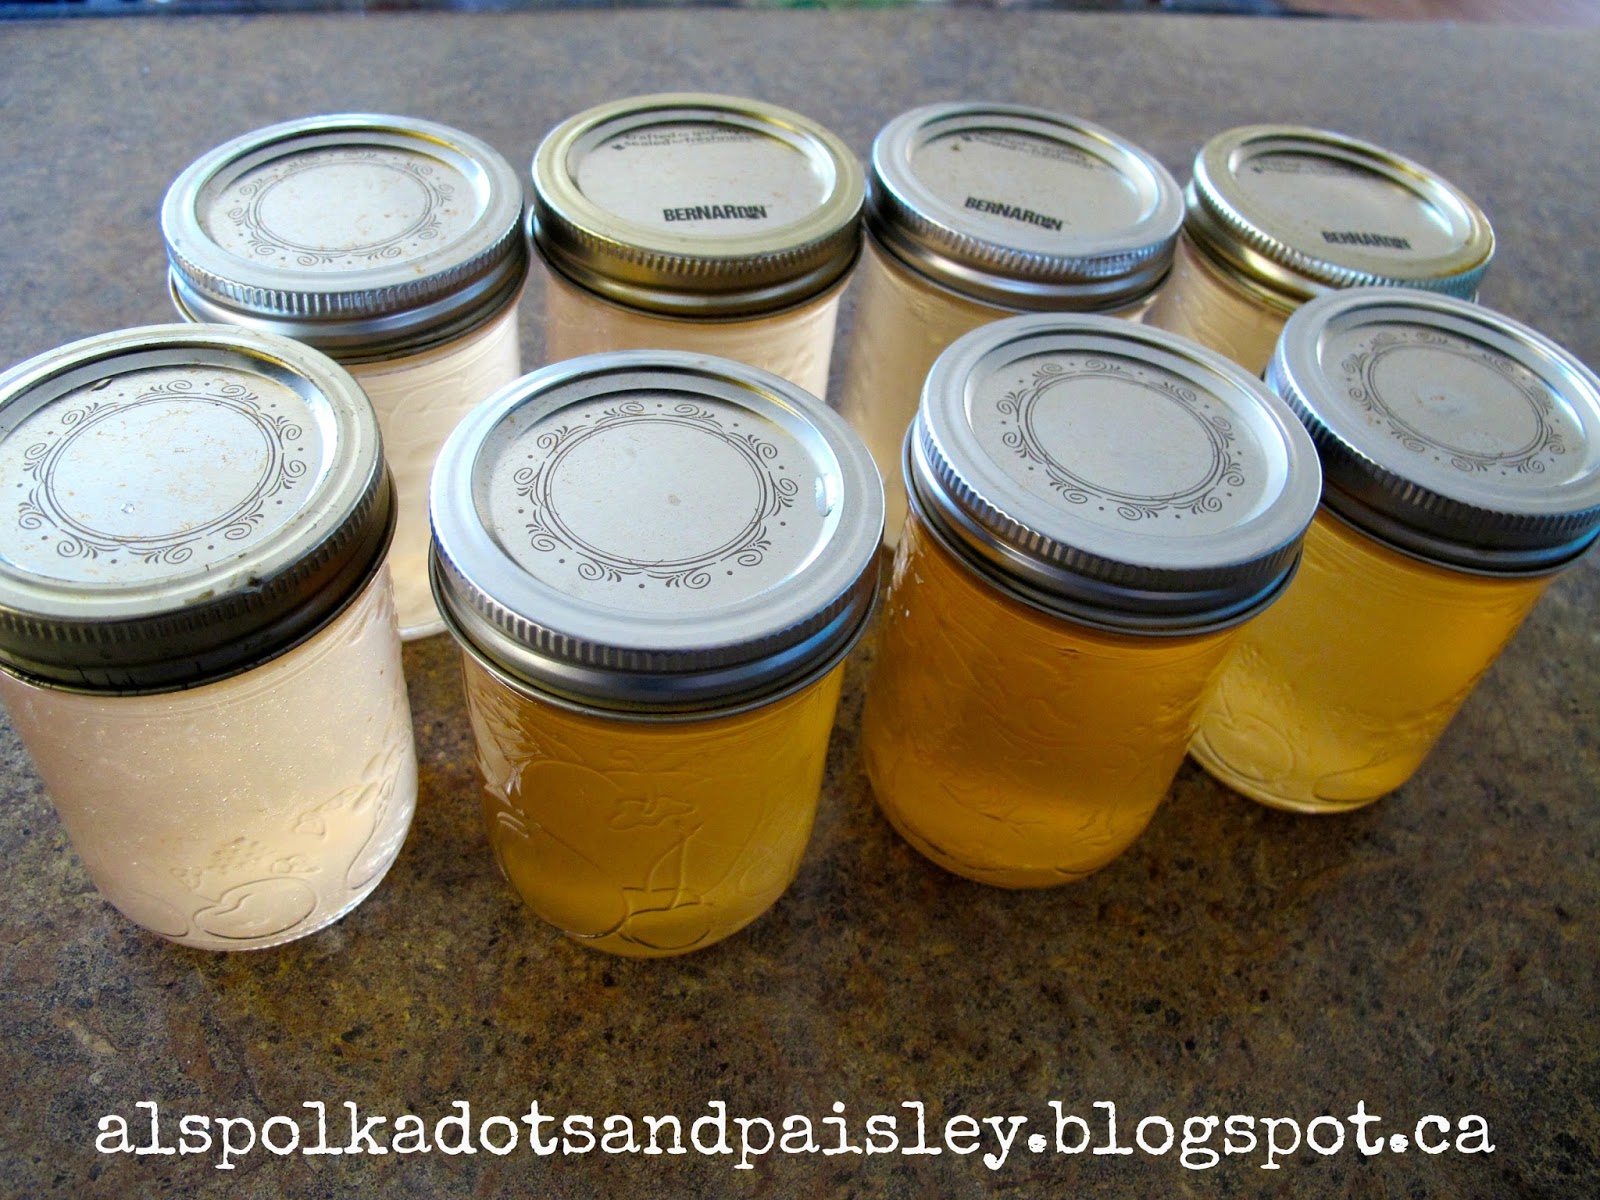
The friend I was visiting is the one who first taught me how to make jams and jelly. In the past we've made strawberry rhubarb jam, peach jam, and habanero jelly.While I was visiting this time she had a giant bag of apples from the yard of a friend so we made a delicious apple jelly.
Steps:

1. Sterilize jars on a cookie sheet with the oven set on low heat.

2. Sterilize lids in hot water.

3. Chop apples until you have about 12 cups. We removed the stems and little black spots on the bottom. We did not remove any dents, bruises, or seeds. 

4. Bring apples to a boil in a pot with 6 cups of water. Simmer 10 minutes, stirring occasionally.

5. Mash until you have a nice mush and simmer an additional 5 minutes.

6. Place mush in a cheese cloth placed over a jug. Use a spoon to move around the mush in order to drain out the juice. Be careful because you don't want to push bits of apple into your juice. The cleaner the juice, the clearer the jelly.

7. Pour the juice into a measuring cup until you have 5 cups. You can wait for the juice to cool before moving on to step 8 but we just washed the pot and kept working.

8. Mix 5 cups of juice, 2 tablespoons of lemon juice, and 7.5 cups of sugar in a clean pot. Bring to a hard boil for 1 minute.

9. Remove from heat, stir in 1 pouch of liquid Certo, and continue to stir and skim off the foam for 5 minutes.
Place in jars while still hot and leave on the counter to set.  You'll notice the jelly get darker as it cools and you'll know it's done when you hear the "ping" and the top doesn't move when you press on it.

There you have it: delicious apply jelly made with fresh local apples. I've been enjoying mine on crackers and toast, smiling every time I eat is as it reminds me of time spent with a friend.

Thanks again for welcoming me here today. If you'd like to see more of my projects, stop on over to Polka Dots and Paisley and say hi. I'd love to have you.


Wednesday, August 14, 2013

Please Welcome My Guest - Deanna

My new friend Deanna  from Gloriously Made has offered to help with a guest post while we are moving this month.  Please give Deanna a warm Kathe With An E welcome!

Hi new friends! I'm Deanna Ritz from Gloriously Made. I hope that everyone is having a great day. Thank you so much for allowing me to tell you about myself and my little corner of the world.  I am a wife and mother of four and am crazy about living gloriously for Jesus, decorating, crafting, cooking and anything DIY. I hope you enjoy this recipe that I am sharing with you today.


This thick and puffy pancake has such a pretty presentation. And, it is extra yummy if you top each slice off with warm pancake syrup or a dollop of whipped cream. Your whole family will devour this breakfast...mine did!! :)

Ingredients:
1/3 cup butter
1 cup all-purpose flour
4 eggs
1 cup milk
Dash of salt
1 can (21oz) apple, peach, or cherry pie filling
Toasted walnuts, optional

Directions:
Place butter in a 10 inch oven proof skillet. Place in a 425 degree oven until melted. In a large mixing bowl, beat the flour, eggs, milk and salt until smooth. Leaving 1 tablespoon melted butter in the skillet, pour the remaining butter into the batter; mix until blended. Pour batter into hot skillet. Bake for 15-20 minutes or until edges are golden brown.
In a small saucepan, warm pie filling over low heat until heated through. Pour into center of puff pancake. Sprinkle with walnuts if desired. Serve immediately.


Source: Taste of Home Simple and Delicious


If you like this recipe then you might also like my Mini German Pancakes.


I would love for you to follow me and receive updates from Gloriously Made. Let me know that you are a new follower and I will gladly follow you back. I LOVE making new blogging friends. :)


 photo pinterest_zpsd41c6620.png  photo twitter_zps4b1bdbfe.png  photo stumbleupon_zps721ffb61.png  photo googleplus_zps6e5525e2.png  photo facebook_zps0758352c.png  photo email_zps73cad791.png Follow on Bloglovin

Sunday, August 11, 2013

Please Welcome My Guest - Jamie

My dear friend Jamie from Love Bakes Good Cakes offered to help with a guest post while we are moving this month.  Please give Jamie a warm Kathe With An E welcome!
use this for the LBGC button2

Thank you so much for having me over again, Kathe! I know you are busy lady and I'm so glad I can be here with all of your wonderful readers again!

I guess I should tell you a little bit about me? I'm Jamie and I blog over at Love Bakes Good Cakes. Don't let the name fool ya though, I share family-friendly recipes that are easy on the cook and on the budget! I'm also a homeschooling mom with 5 kids. You could say that "chaos" is the normal at our house! :) We recently moved to Phoenix from North Carolina, so I totally feel for Kathe and Mr. B right now. I know how un-fun moving is!

Enough about me, let's talk food! The last time I was here (almost a year ago), I shared my One Pot Goulash recipe. I let Kathe pick the recipe today and she went with my Southwest Bubble Bake. Maybe some of y'all have heard of "bubble bakes" before ... but for those of you who haven't, it's basically biscuits topped with almost anything you can imagine and baked. It reminds me sort of being like a deep-dish pizza. My family really likes Mexican and Southwest inspired food, so I tried to come up with something to appease us! :) If you're a fan of Mexican/Southwest cuisine, this will be right up your alley!

This is a super simple recipe - and if you have leftover taco meat, you could easily skip that part of the recipe to make this a super easy meal! You can also skip all of the spices by using a packet of taco seasoning - the choice is yours!

I hope y'all enjoy! If you'd like to see more great recipes from Love Bakes Good Cakes, I have about 250 (and counting) recipes in my index. I'd love for you to come over and have a look around .... you can find my social media links below too if you'd like to catch me there!

Southwest Bubble Bake 2

Southwest Bubble Bake
Printable Recipe
Yield: 8 servings

2 tubes (10-12 oz. each) refrigerated canned biscuits
1 cup salsa
1 lb. boneless, skinless chicken breasts or lean ground beef
1 tbsp. chili powder
2 tsp. all-purpose flour
1½ tsp. cumin
1 tsp. salt
½ tsp. pepper
½ tsp. paprika
½ tsp. garlic powder
¼ tsp. onion powder
¼ tsp. oregano
⅛ tsp. ground cayenne pepper
1½ cup Mexican cheese blend, shredded
1 small onion, chopped
½ of a green pepper, chopped
1 can (4.25 oz.) sliced black olives, drained
1 avocado, diced (optional)
Additional salsa (optional)
Sour cream (optional)

Preheat oven to 350°F. 

Spray a 9x13-in. baking dish with cooking spray. Quarter the biscuits and place them evenly in the prepared pan. Top with salsa. Set aside.

If using chicken: In a skillet over medium-high heat, add the chicken breasts and cover with water. Bring to a boil. Reduce heat to medium-low and continue to cook (replace some of the water if necessary) until the chicken is easy to shred with a fork - about 10-15 minutes. Drain the water and shred the chicken. Add ⅔ cup water and the chili powder, flour, cumin, salt, pepper, paprika, garlic powder, onion powder, oregano and cayenne pepper. Cook and still until most of the water has evaporated.

If using ground beef: In a skillet over medium-high heat, cook and crumble the ground beef until meat is no longer pink; drain. Add  ⅔ cup water and the chili powder, flour, cumin, salt, pepper, paprika, garlic powder, onion powder, oregano and cayenne pepper. Cook and still until most of the water has evaporated.

For both versions: Add the cooked and seasoned meat to the prepared pan. Bake uncovered for 20 minutes. Top with cheese, onion, green pepper and black olives and continue to bake for an additional 10 minutes or until the biscuits are cooked through and the cheese is melted. Serve with avocado, additional salsa and/or sour cream, if desired.

*** Note: You may substitute one package of taco seasoning for the chili powder, flour, cumin, salt, pepper, paprika, garlic powder, onion powder, oregano and cayenne pepper.

Find Love Bakes Good Cakes on FacebookFind Love Bakes Good Cakes on TwitterFind Love Bakes Good Cakes on PinterestFind Love Bakes Good Cakes on Google+Go to Love Bakes Good Cakes blogImage Map

Sunday, August 4, 2013

Please Welcome My Guest - Jess

My friend Jess offered to help with a guest post while we are moving this month.  Please give Jess a warm welcome!

Hello all! I'm Plucky from Plucky’s Second Thought…but most call me Jess. :) Why "Plucky" you may ask? Well, it was a nickname when I was younger and it was one that was never forgotten! At Plucky’s Second Thought I try to post easy craft projects and recipes that anyone could accomplish. Yep, you don’t have to be Martha Stewart or Rachael Ray to attempt anything on my blog! There are also a variety of travel and product reviews as well as some awesome giveaways and link parties! :)
What family doesn't love a good Pork Chop? However, if you're like me and like to spice up your chops every now and then, then THIS is the recipe for you! :) I'm normally the one that likes to use BBQ sauce on every type of meat, but there is no need when you try this recipe! :) It's EASY, YUMMY, and something you'll probably be making the next time you have Pork Chops! :) ENJOY!
Glazed_Pork_Chops
Glazed Pork Chops Ingredients:
  • 4 boneless pork chops
  • Salt and pepper
  • 2 tbsp brown sugar
  • 1 tbsp onion, finely chopped
  • 1 tsp chili powder
  • 1/2 tsp garlic powder
  • 1/2 tsp mustard
Directions:
  • Sprinkle both sides of the pork chops with salt and pepper.
  • Place chops in a skillet on medium high heat.
  • In a small bowl combine brown sugar, onion, chili powder, garlic powder and mustard.
  • Once the chops are slightly browned on both sides, spread mixture on both sides.
  • Continue to cook in skillet until chops are cooked through.
source: http://www.sixsistersstuff.com/2013/06/sweet-and-spicy-pork-recipe.html


Sunday, October 28, 2012

Recipe~Chicken In The Chips

 I believe I ordered this recipe collection
booklet from the Sunday ad inserts
many many years ago. 

It's pages are wrinkled and yellowed
from use but, it is almost like a
treasured heirloom. 
I will never part with it!
So many interesting and delicious recipes!

My very favorite is,
Chicken In The Chips.


I have been making this recipe for 25 years now!
My sons grew up on it
and it's one of Mr. B's favorites.
It is probably one of the best comfort foods
in my recipe arsenal.
Chicken, cheese, Fritos...
what is not to love about it?
Oh did I forget to mention that it's 
quick?
It's quick!

 It's a casserole you can make ahead and pop in the oven for 
a fast and satisfying dinner.
Most, if not all, of the ingredients are probably
sitting in your pantry right now!

Here's the rundown:

2 to 2 1/2 cups diced cooked chicken (or, leftover Thanksgiving turkey)
1 - 10 1/2 ounce can condensed cream of chicken soup
1/2 cup sour cream
1/2 cup picante sauce (Pace Hot really is the best!)
2 cups (8 ounces) shredded monterey jack cheese
2 cups coarsely crushed Fritos (no need to go crazy here, keep the pieces recognizable)

Combine everything, saving some of the cheese and Fritos for the top. 
Mix well.
Spoon the mixture into a lightly sprayed 1 1/2 quart casserole dish and top with the saved cheese and Fritos. 
Bake, uncovered, at 350 degrees, for 20 to 25 minutes or until hot and bubbly.
And enjoy!

This truly is a hearty, family-pleasing casserole!

I hope you give it a try and 
that it becomes a favorite of your family!

This post is is no way affiliated with Pace Picante Sauce or Fritos (I wish!). I just wanted to share a quick and easy recipe with you 

Click here to see where I may be partying this week.

And don't forget to come by on Tuesday's
for the link party.
Pin It