ic Test Blog: homemade chalk paint
Showing posts with label homemade chalk paint. Show all posts

Sunday, March 1, 2015

DIY Shutter From A Bathroom Medicine Cabinet

DIY Shutter From A Bathroom Medicine Cabinet Door Using Homemade Chalk Paint
Imagine my excitement a few weeks ago when I found out they were opening a Habitat Restore in my town!  OMG!  I was so excited I could hardly wait for them to open and was there just after the doors were unlocked! If you have never ventured into a Restore, go!  NOW!  And go often as the inventory is always changing.  I picked up several things on my first trip.  One was this wooden louvered door medicine cabinet.
DIY Shutter From A Bathroom Medicine Cabinet Door Using Homemade Chalk Paint
I have been on the lookout for some small shutters but have been denied ever finding any.  When I saw this medicine cabinet my motto came into play.  It is not what it is, but what it can be!  In fact, I was so excited I forgot to take a photo of the full cabinet.  I had already taken the door off and put the metal box in the recycle trash and it was on the truck before I realized my bloggy mistake! 
DIY Shutter From A Bathroom Medicine Cabinet Door Using Homemade Chalk Paint
Anywho, for the price I paid, I was more than happy with my purchase!
DIY Shutter From A Bathroom Medicine Cabinet Door Using Homemade Chalk Paint
Of course, I couldn't leave it in its dark stained state.  Plus, I have been wanting to show my MIL the wonders of chalk paint.  So, I gathered my materials and we gave it a new look.
DIY Shutter From A Bathroom Medicine Cabinet Door Using Homemade Chalk Paint
A few years ago I had transformed a thrifted nightstand with homemade chalk paint and you can find the recipe for the chalk paint in that post. I find it to be so simple to use and I love the finish it creates once you give it a coat of finishing wax. Linda, my MIL, just loved helping me and can't wait to give new life to a project of her own once she finds her own home!
DIY Shutter From A Bathroom Medicine Cabinet Door Using Homemade Chalk Paint
Once we had painted on two coats of the chalk paint and wax, and distressed some spots with a sanding sponge, I decided my shutter needed something more. So, I took a few yellowed pages from a very used dictionary I had, tore them some and glued them to the top and bottom of the shutter.
DIY Shutter From A Bathroom Medicine Cabinet Door Using Homemade Chalk Paint

DIY Shutter From A Bathroom Medicine Cabinet Door Using Homemade Chalk Paint
Complete and utter love!  
DIY Shutter From A Bathroom Medicine Cabinet Door Using Homemade Chalk Paint

DIY Shutter From A Bathroom Medicine Cabinet Door Using Homemade Chalk Paint
It is exactly what the small wall above the TV alcove needed! Total spent?  I already had the paint, plaster of paris and brushes on hand so, just $5.00 for the cabinet! My kind of thrifty decor for sure!  Remember, I said earlier I picked up "several items" at the Restore that day. You'll have to keep checking back to see what else I found to make over! You're gonna love it! 

Like what you see? 
Well then, follow me by email and never miss a new post
Click here to see where I may be partying this week. 
AND
Don't forget to come by on Tuesday's
for the link party.

Sunday, September 16, 2012

Chalk Paint Transformation

Remember back in July when I introduced you
to Veronica?
Veronica is a thrifty find from our local
Arc Thrift Store.
I paid all of $7.50 for her.
 
She has lived very happily on my side of the bed.
She came with a few dips and divets, mars in her
otherwise pretty face, and I decided it 
was time to transform her into the true beauty
I knew she was.
I had been really wanting to try my hand
at homemade chalk paint.
There are recipes all over the web and the one I
went with consists of
2 cups paint (I used some of a gallon of 
Olympic eggshell called Belgian Waffle, an off white with a tinge of yellow)
 5 tablespoons Plaster of Paris
Several tablespoons of water
I mixed the Plaster of Paris
with enough water to make a paste like
consistency and then added it to the paint and stirred really well.

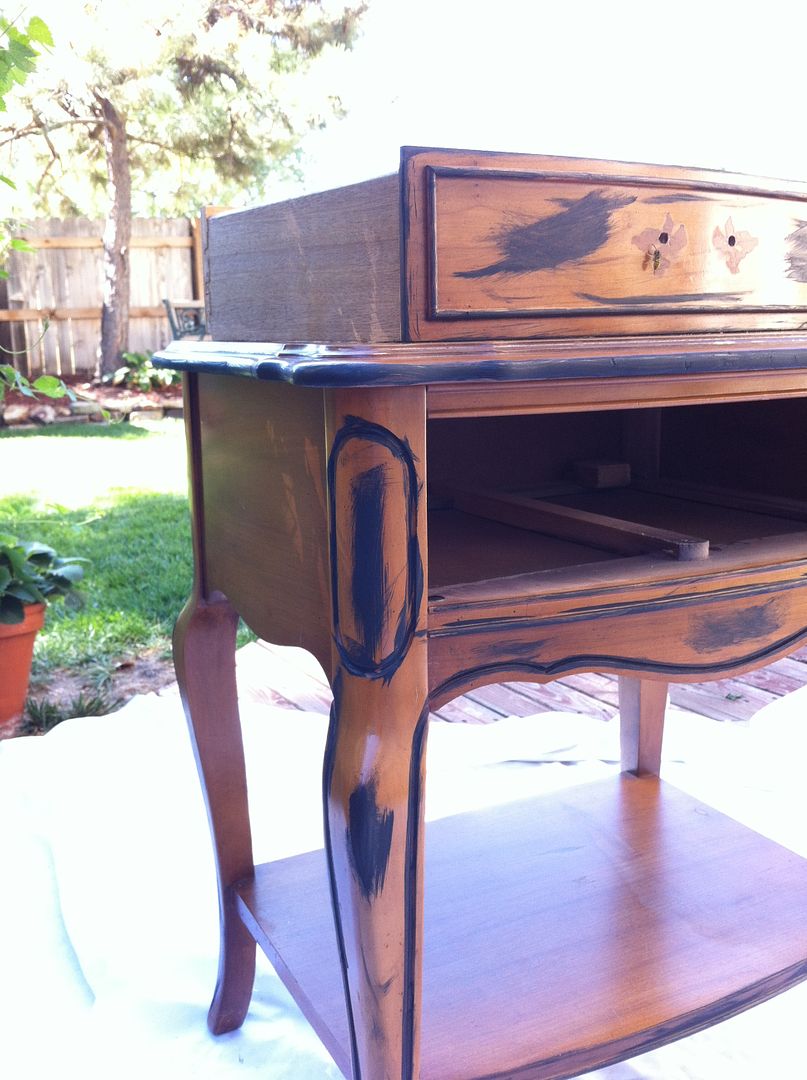
After taking Veronica outside,
I lightly brushed some black craft paint
on areas I wanted to distress later.
I dabbed generously some Vaseline
on some areas I wanted to distress later.
 I may have got a little carried away 
with the black paint...

I then brushed the first coat of my chalk paint 
al over her, except the top.
I then went and got my nails done.
Hey, I HAD to! 
I needed to let the first coat dry at least 2 hours
and if I didn't get out of the house
I knew I'd be futzing over her.

Once my nails the first coat was dry,
I applied a second coat.

I let her dry thoroughly for several days
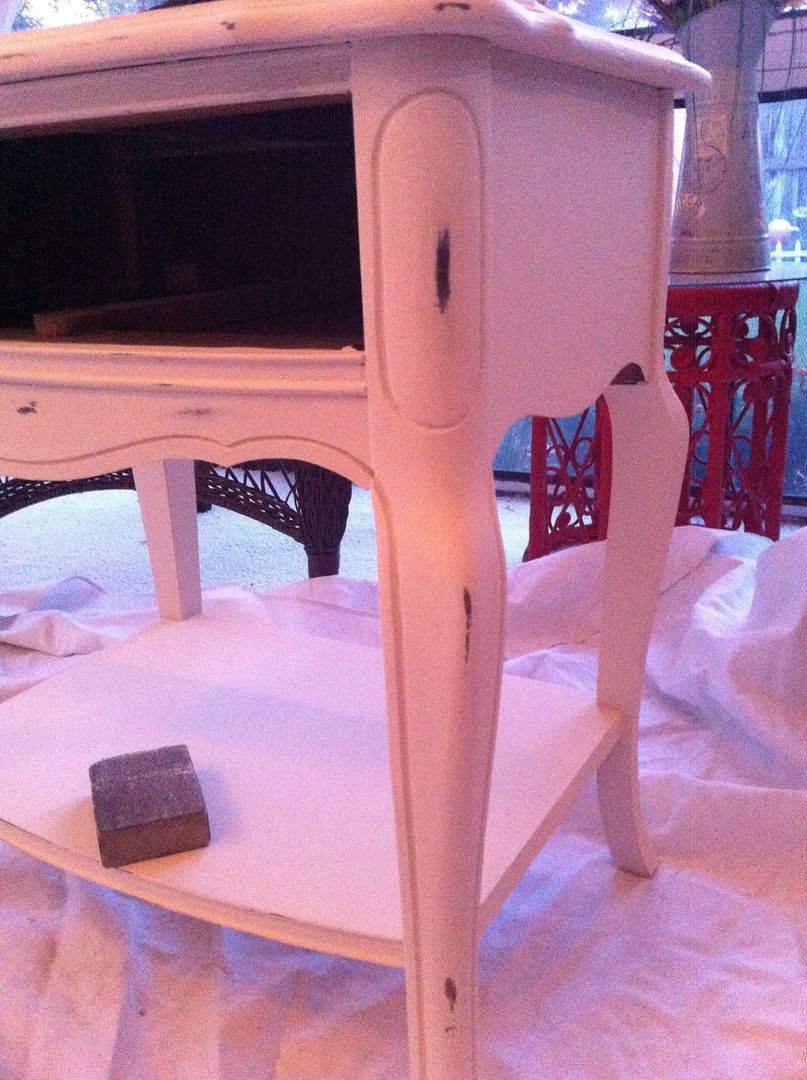
and then took a fine grit sanding block
to the areas I wanted to distress.
  (sorry for the pinkish tones of the photo.
Not sure if you have noticed but, it's getting darker 
really early now LOL)
I showed great restraint in the distressing.
I just wanted it to look as though
Veronica had lived a much loved and useful life.
Next came a coat of finishing wax applied with a soft,
lint free cloth.
 I left the wax on for half an hour and then buffed 
with a clean soft cloth.

I applied another coat of wax a few days later.

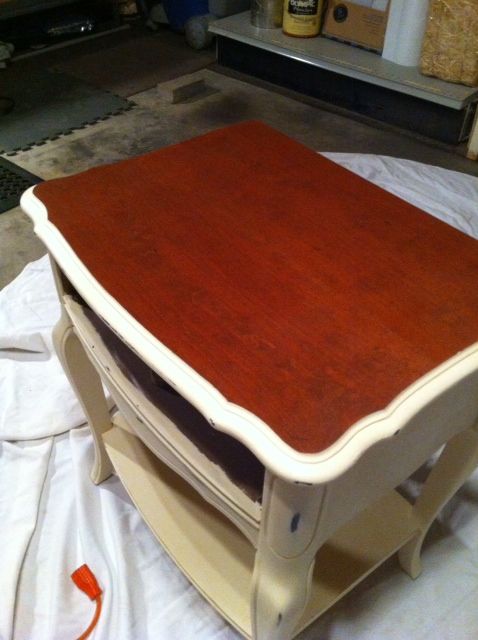
Now it was time to attack the top.
Mr. B was kind enough to let me borrow
his orbital sander with 150 grit sandpaper.
I want one of my own and it is on my Christmas list.
 (action shot)
(close up)
After sanding and giving her a good wipe down I
applied a red chestnut stain
 (another action shot)
Mr. B was greatly impressed with my staining skills!
After wiping it on, I used a clean cloth and wiped off the excess.
I let her sit for a good 24 hours and then rubbed on
a coat of wax and after a half hour, buffed it off.
I repeated with another coat of wax the next day.

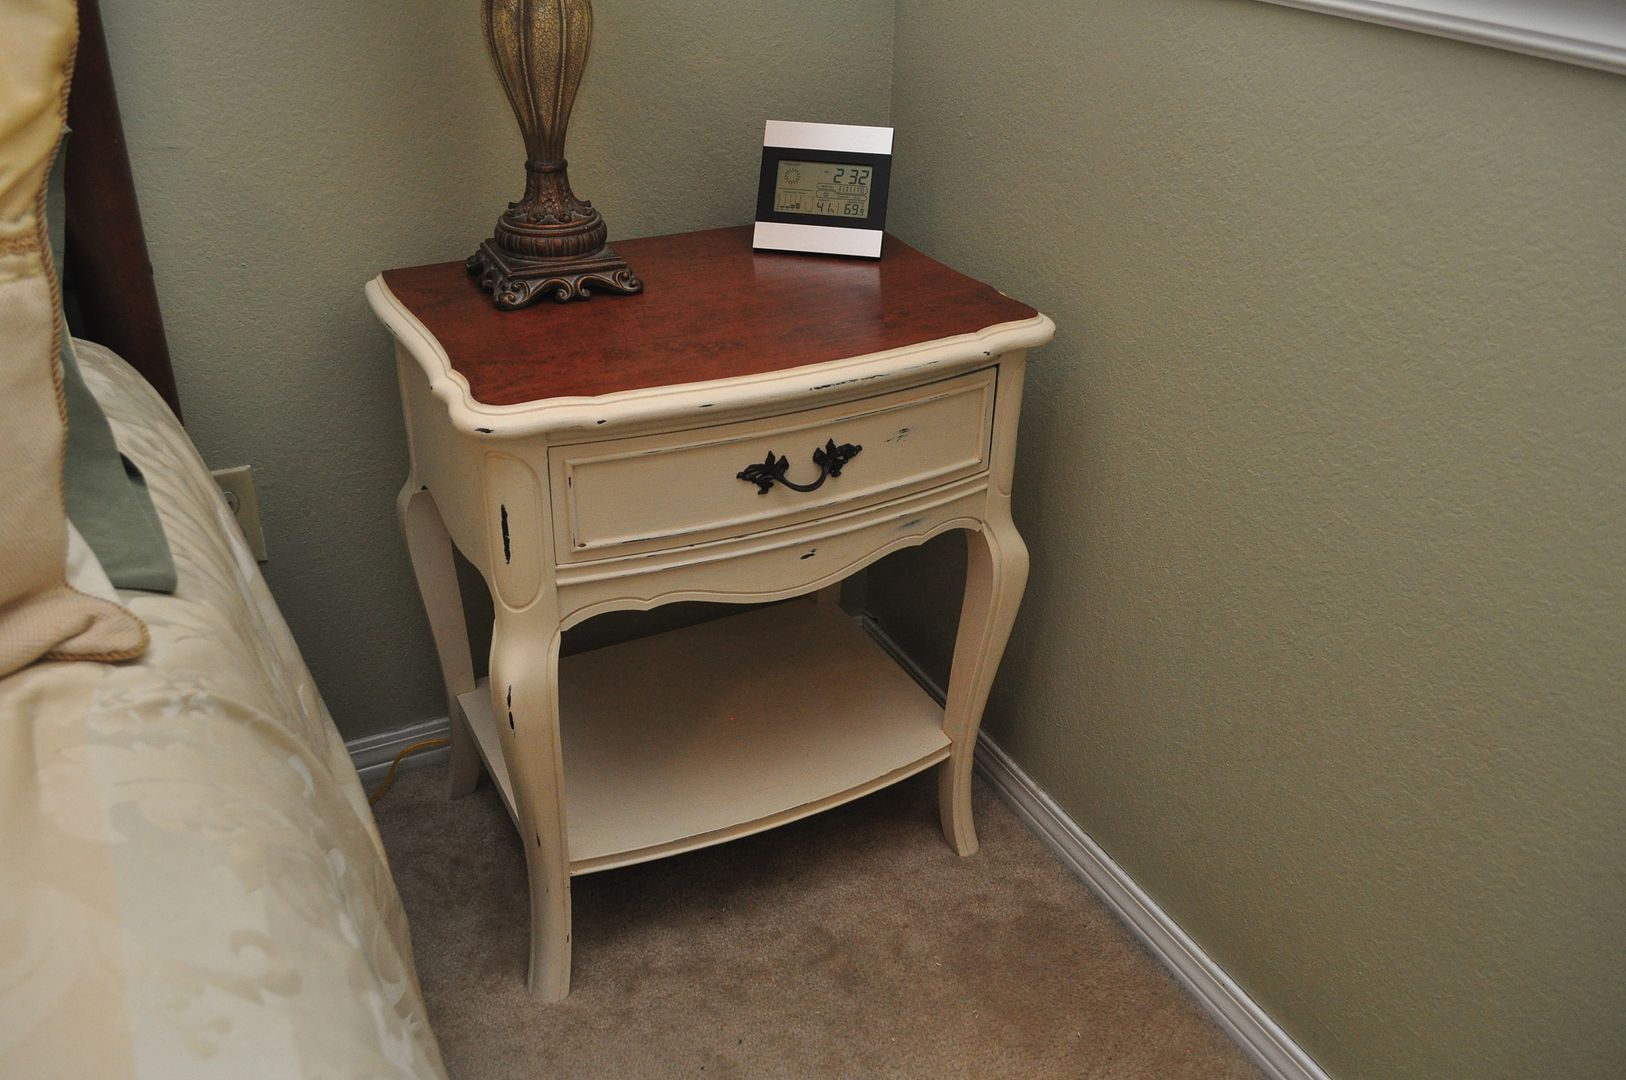
Done!
Look how deep and rich that stain looks!
LOVE!
And here is Veronica in her
natural habitat.

For someone that is very impatient this
project was a true lesson in patience.
It took a full week from start to finish but,
I seriously could not be more in love with how
she turned out!
The only thing I had to buy was the Plaster of Paris,
everything else we had on hand. 

I already have my eye on another piece
of furniture that needs a facelift!

Click here to see where I may be partying this week.

And don't forget to come by on Tuesday's
for the link party.